To Clean Truck Engine Bay, make sure your truck’s engine is cool and disconnect the battery to avoid any electrical mishaps.
Protect sensitive components like the alternator and fuse box using waterproof covers. Apply an environmentally friendly degreaser evenly across the engine bay, focusing on greasy spots.
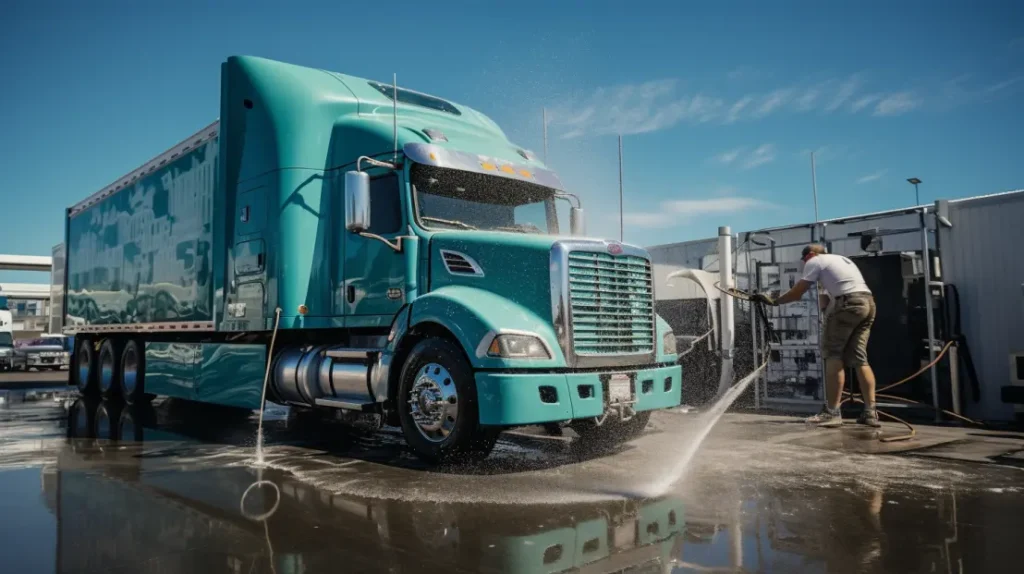
Rinse carefully with a low-pressure water stream, avoiding direct contact with electrical parts.
Dry the engine bay thoroughly using microfiber towels or a leaf blower.
Finish by applying a protective spray to shield against dirt and moisture. Proper cleaning not only keeps your truck in top condition but also reveals how simple maintaining cleanliness can be.
As a Canadian chemical manufacturer, we will explain more in-depth on how to clean your truck’s engine Bay.
Key Takeaways
- Allow the engine to cool for at least 30 minutes before starting cleaning.
- Disconnect the battery, starting with the negative terminal, to ensure safety.
- Cover all sensitive electrical components such as the alternator and fuse box.
- Apply an environmentally friendly degreaser evenly across the engine bay.
- Rinse gently with low-pressure water and dry thoroughly with microfiber towels or compressed air.
1. Preparing Your Supplies to clean Truck Engine’s Bay
Before you begin cleaning your truck’s engine bay, gather all the necessary supplies. Our Truck wash soap can be a handy soap to clean your truck
Tool selection is vital; you’ll need a variety of brushes, including soft and stiff-bristled types, to reach different areas without causing damage.
A set of screwdrivers might also be useful to remove any covers or components that could obstruct cleaning. We also have an article How to Clean a Dirty Truck Engine which offers a thorough process on the cleaning process.
Safety gear is equally important to make certain you’re protected throughout the process.
Always wear gloves to shield your hands from harsh chemicals and prevent cuts from sharp engine components.
Safety goggles are a must to protect your eyes from splashes or debris and consider a dust mask if you’re sensitive to dust and fumes. It’s also wise to wear an old shirt or a workshop apron to keep your clothes clean.
2. Cool your Truck’s Engine Before Cleaning

Before you start cleaning your truck’s engine bay, it’s important to let the engine cool down adequately.
You should monitor the engine temperature to determine when it’s safe to begin; typically, this can take a few hours.
Knowing the ideal cooling duration helps prevent any accidental burns or damage to the engine components.
If you’re curious about why truck engines last longer, we have a great article Why Do Truck Engines Last Longer Than the Car Engines?
1. Ideal Cooling Duration
Allow your truck’s engine to cool for at least 30 minutes after driving to make sure it’s safe to start cleaning. This cooling period is crucial to prevent burns and make sure that heat accumulation in the engine bay has adequately dissipated. Observing cooldown benchmarks can greatly enhance your safety.
Here are key reasons to wait 30 minutes:
- Reduces Risk of Injury: High temperatures can cause severe burns.
- Prevents Damage: Cooling helps protect sensitive engine components.
- Enhances Cleaning Effectiveness: A cooler engine is safer and easier to clean.
- Ensures Accurate Inspection: Heat can mask leaks and cracks; a cooled engine reveals true conditions.
Always prioritize your safety by adhering to these guidelines.
2. Engine Temperature Monitoring
To accurately monitor your truck’s engine temperature and make sure it has cooled sufficiently, use a reliable thermometer.
Temperature sensors placed strategically around the engine can provide real-time data on heat levels. This setup helps you to confirm if the engine is cool enough for cleaning without causing damage.
Heat indicators are essential tools in this process—they give you a clear, visual representation of the temperature status.
You’ll want to wait until these indicators show a safe, low temperature before beginning your cleaning. Remember, jumping in too soon can lead to burns or other injuries. So, patience is key here. Always double-check the readings and verify everything’s set before you start.
3. Disconnect the Battery before cleaning the Truck’s Engine Bay
First, you’ll need to disconnect the battery to guarantee your safety while cleaning the engine bay.
Understanding different battery types is essential, as is wearing the right safety gear. Whether you’re working with a standard lead-acid battery or a more modern AGM (Absorbed Glass Mat) battery, the process requires caution.
Here’s how you can safely disconnect your truck’s battery:
- Locate the Battery: Find your battery, usually situated in the front of the engine bay. It might be under a plastic cover which you’ll need to remove.
- Wear Safety Gear: Always put on gloves and safety glasses to protect your hands and eyes from corrosive battery acid.
- Disconnect the Negative Terminal: Always start with the negative terminal to minimize the risk of a short circuit. Use the appropriate size wrench to loosen the terminal nut.
- Disconnect the Positive Terminal: After the negative, move on to the positive terminal. Ensure both cables are clear of any metal surfaces.
Once disconnected, make sure the terminals don’t touch anything conductive. This prevents accidental grounding or electrical shorts, keeping the cleaning process safe and effective.
4. Cover Electrical Components before cleaning Truck’s Engine Bay
After disconnecting the battery, you’ll want to cover all sensitive electrical components in the engine bay to prevent water damage during cleaning.
Waterproof covers are essential here. You can use specially designed plastic covers or even sturdy plastic bags as a quick DIY solution. Make sure they’re securely fastened to avoid slipping off during the cleaning process.
Insulation tips come in handy to enhance the protection of these components. It’s a good idea to use rubber or foam tapes to seal the edges of the covers.
This extra step helps in creating a barrier against moisture and dirt, which could otherwise cause short circuits or corrosion. Focus on areas like the alternator, fuse box, and any exposed wiring or connectors.
When applying these covers, be certain they don’t hinder your access to areas that need cleaning. They should be easy to remove or reposition as you move around the engine bay. Remember, the goal is to shield these parts from water, not to make them inaccessible.
5. Degreasing the Engine
Now that you’ve safeguarded the electrical components, it’s time to focus on degreasing your truck’s engine.
You’ll need to select an appropriate degreaser that can effectively cut through the grime without damaging engine parts.
Apply the degreaser using the right techniques to guarantee thorough coverage and best cleaning results.
For suitable degreasing options, check out our range of Pressure Washing Chemicals
1. Select Appropriate Degreaser
Selecting the appropriate degreaser is crucial for thoroughly cleaning your truck’s engine bay. The right degreaser will cut through grease and grime without harming engine components. Consider degreaser toxicity and familiarize yourself with different degreaser brands to make an informed choice.
Here are some factors to guide you:
- Environmental Impact: Opt for eco-friendly degreasers that are less toxic and safer for both you and the environment.
- Strength: Choose a formula strong enough to tackle engine grime but gentle on sensitive parts.
- Compatibility: Make sure the degreaser is suitable for your truck’s engine materials.
- Ease of Use: Some products are ready to use, while others might require dilution.
Pick wisely to keep your engine running smoothly and looking great.
2. Application Techniques
Once you’ve selected the right degreaser, it’s important to apply it correctly to effectively clean your truck’s engine bay. Start by choosing the best tool for the application.
A spray bottle or a pump sprayer can guarantee even coverage and control over the spray patterns. You’ll want to adjust the nozzle to create a fine mist rather than a direct stream to prevent oversaturation, which can damage sensitive components.
Apply the degreaser generously but cautiously, targeting greasy spots and hard-to-reach areas. Let it sit for a few minutes to break down the grime.
For tough spots, use a brush to gently scrub without harming the engine surfaces. This method ensures you’re using your tools and degreaser efficiently, keeping your engine looking and running great.
6. Scrubbing Components

Begin scrubbing the engine components using a soft-bristled brush to gently remove dirt and grime. It’s important to choose the right brush types and cleaning agents to effectively tackle the task without damaging your truck’s engine.
Soft brushes are ideal for delicate areas, whereas stiffer brushes can be used on harder surfaces. Always make sure the cleaning agents are suitable for automotive use to prevent corrosion or other damage.
Here are a few tips to make the scrubbing process more effective:
- Prep the Area: Make certain all electrical components are covered or removed if possible, to avoid water damage.
- Choose the Right Brush: Use a soft brush on sensitive parts like wiring or painted surfaces, and a harder brush for metal parts and tough grime.
- Apply the Right Cleaning Agent: Opt for a degreaser or a specialized engine cleaner. Apply directly to the brush or spray onto the components.
- Scrub Gently but Thoroughly: Work in small sections, scrubbing in circular motions to lift away the dirt without scratching the surfaces.
Take your time to work through all the nooks and crannies, ensuring each component is treated with care. This step is vital for maintaining engine performance and longevity.
7. Rinsing the Engine Bay
After scrubbing the components of your truck’s engine bay, it’s essential to rinse off any residue properly.
You’ll need to choose the right water pressure to avoid damaging sensitive parts, which you should identify beforehand.
1. Choose Right Water Pressure
Selecting the appropriate water pressure is crucial when rinsing your truck’s engine bay to avoid damaging sensitive components. The right pressure ensures that dirt and debris are effectively washed away without harming the engine.
Here are some key considerations:
- Nozzle types: Choose a nozzle that can adjust the spray pattern and pressure.
- Water sources: Make sure your water source can provide consistent pressure.
- Pressure settings: Aim for a gentle to moderate pressure.
- Test spray: Always test the water pressure on a less sensitive area before moving to more critical parts of the engine.
2. Identify Sensitive Components
Before rinsing your truck’s engine bay, it’s important to identify sensitive components such as the alternator, electronic control units, and air intake system.
Component identification is vital to prevent water damage during cleaning. Perform a thorough visual inspection and familiarize yourself with their locations. Here’s a quick guide:
| Component | Location | Note |
|---|---|---|
| Alternator | Front, center | Avoid direct water spray |
| Electronic Control Units (ECU) | Various | Typically labeled, shield if possible |
| Air Intake System | Near the grille | Cover to prevent water entry |
You’ll want to cover these parts with waterproof materials like plastic bags or aluminum foil. This extra step ensures they stay dry while you focus on getting the rest of the bay clean.
3. Drying Techniques Post-Rinse
Once you’ve rinsed your truck’s engine bay, it’s crucial to dry it properly to prevent any water-related issues. Here’s how to guarantee you’re optimizing airflow and using the right towel types:
- Microfiber Towels: Use these to soak up water without scratching surfaces. They’re gentle and highly absorbent.
- Compressed Air: This can effectively remove water from nooks and crannies, promoting airflow optimization.
- Leaf Blower: An unconventional tool, but great for pushing out excess water and speeding up the drying process.
- Heat Gun on Low Setting: Carefully apply heat to evaporate moisture quickly. Be cautious to avoid any heat-sensitive components.
8. Drying the Engine Bay
- Start drying the engine bay by gently wiping down components with a microfiber cloth
- Begin by blotting excess water from larger areas and gradually move to smaller, more intricate components
- Good air circulation is essential for enhancing drying; leave the hood open for natural airflow or use a fan in a garage
- Consider using a waffle-weave drying towel in addition to microfiber towels for effective water absorption
- Check for any remaining moisture after wiping down the engine bay, especially in hard-to-reach areas
- Use a compressed air can to blow out water from tight spots to ensure the engine bay is completely dry
9. Applying Protectant
Now that your engine bay is dry, apply a protectant to shield surfaces from dirt and reduce future cleaning efforts. Using a quality protectant not only makes the engine components look good but also helps in preserving them against the elements, especially under harsh conditions.
When selecting a protectant, you’ll want to focus on a few key features:
- UV Protection: Choose a product that offers UV protection to prevent the fading and cracking of hoses, wires, and plastic components.
- Condition Seals: It should help condition rubber seals and gaskets, keeping them flexible and preventing leaks.
- Dirt and Grease Resistance: A good protectant will repel dust and grease, making it easier to keep the engine bay clean.
- Non-greasy Finish: Look for a formula that leaves a non-greasy finish to maintain a clean appearance without attracting additional dirt.
To apply, spray the protectant onto a clean microfiber cloth or directly onto the surface, depending on the product instructions. Gently wipe down all exposed parts, ensuring even coverage. Avoid spraying directly onto electrical components. Allow it to soak in and dry before touching the treated surfaces. This step not only beautifies your engine bay but significantly reduces your maintenance time.
10. Final Inspection and Reassembly
- Apply protectant and ensure all surfaces are dry
- Inspect and reassemble components of the truck’s engine bay
- Use component checklist to verify parts are accounted for and in good condition
- Check hoses, belts, and connectors for wear or damage
- Replace any damaged parts to prevent future issues
- Reconnect the battery, ensuring clean and tight terminals
- Reconnect any electrical connectors securely without corrosion
- Reinstall air filter and engine cover, ensuring proper fit and alignment
- Tighten screws and bolts to manufacturer’s specifications
- Double-check fluid levels (oil, coolant, brake fluid) and top off if necessary
- Start engine and listen for any unusual noises
- Smooth start and steady idle indicate successful reassembly
11. Frequently Asked Questions
1. How Often Should I Clean My Truck’s Engine Bay?
You should clean your truck’s engine bay every 3 to 6 months. Adjust the cleaning schedule based on seasonal factors, like road salt in winter or dust in summer, to maintain peak performance.
2. Can Cleaning Improve My Truck’s Performance?
Yes, cleaning can improve your truck’s performance. It leads to an efficiency boost and provides maintenance insights by revealing potential issues that aren’t visible under dirt and grime. Regular cleaning is beneficial.
3. What Are the Risks of Not Cleaning the Engine Bay?
If you don’t clean your engine bay, you’re risking fire hazards and component corrosion. This neglect can lead to serious safety issues and potentially costly repairs down the line. Stay vigilant!
4. Is It Necessary to Use Specific Brands of Degreaser?
You don’t need specific brands; focus on degreaser ingredients that suit your needs and consider their environmental impact. Generic brands often work as well, just check their compatibility with your surfaces.
5. Can Engine Bay Cleaning Void My Truck’s Warranty?
Cleaning your truck’s engine bay won’t necessarily void your warranty. However, you should check the warranty specifics and adhere to the manufacturer guidelines to make sure you’re not doing anything that could affect it.
Conclusion
Well, you’ve just spent hours cleaning your truck’s engine bay, only to realize that nobody will see it under the hood—ironic, right? But, take pride in knowing that your engine is now as sparkling as a showroom model.
Remember, to reconnect the battery, carefully remove any protective covers, and give everything one last check.
This isn’t just about beauty; it’s about maintaining the heart of your truck. So, pat yourself on the back; your engine and your future self will thank you.
For additional knowledge about engine cleaning, do check out our post on what is Engine Steam Cleaning?
Lastly, don’t forget to browse our premium quality cleaning chemicals to maintain your engine’s longevity and performance. From degreasers to aluminum brighteners and cleaners, we have everything you need to keep your engine bay shining clean.